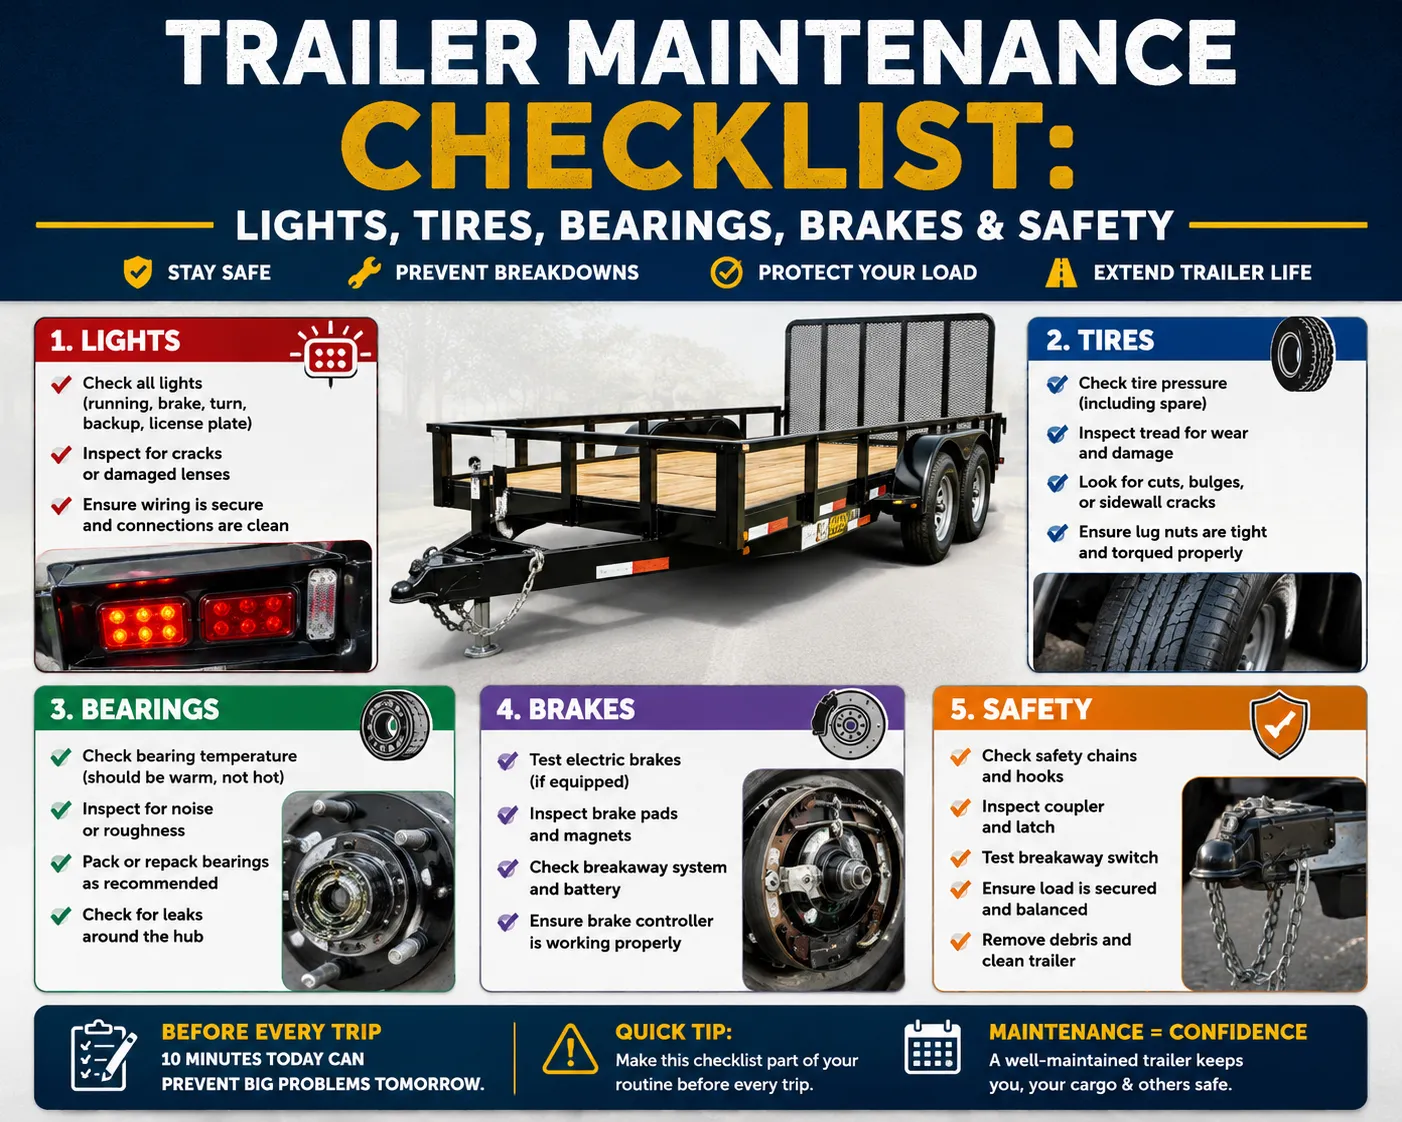
Trailer brake troubleshooting starts with understanding one simple fact: when trailer brakes stop working correctly, the problem can come from the tow vehicle, brake controller, wiring, electrical connectors, magnets, mechanical brake components, or brake adjustment. Symptoms such as weak braking, locked wheels, pulling to one side, overheating, or intermittent operation should never be ignored. This guide walks you through the most common trailer brake problems, how to identify their likely causes, and the practical steps you can take to restore safe and predictable braking.
A trailer’s braking system plays a major role in towing stability. Your tow vehicle may have powerful brakes, but when pulling a heavy trailer, it needs help controlling the additional weight. Properly functioning trailer brakes reduce the braking load on the tow vehicle and help keep the trailer under control during routine stops and emergency braking.
Whether you tow a utility trailer, equipment trailer, travel trailer, horse trailer, or car hauler, knowing how to recognize braking problems can help you catch small issues before they become expensive—or dangerous.
How Trailer Brakes Work
Before diagnosing a problem, it helps to understand what happens when you press the brake pedal.
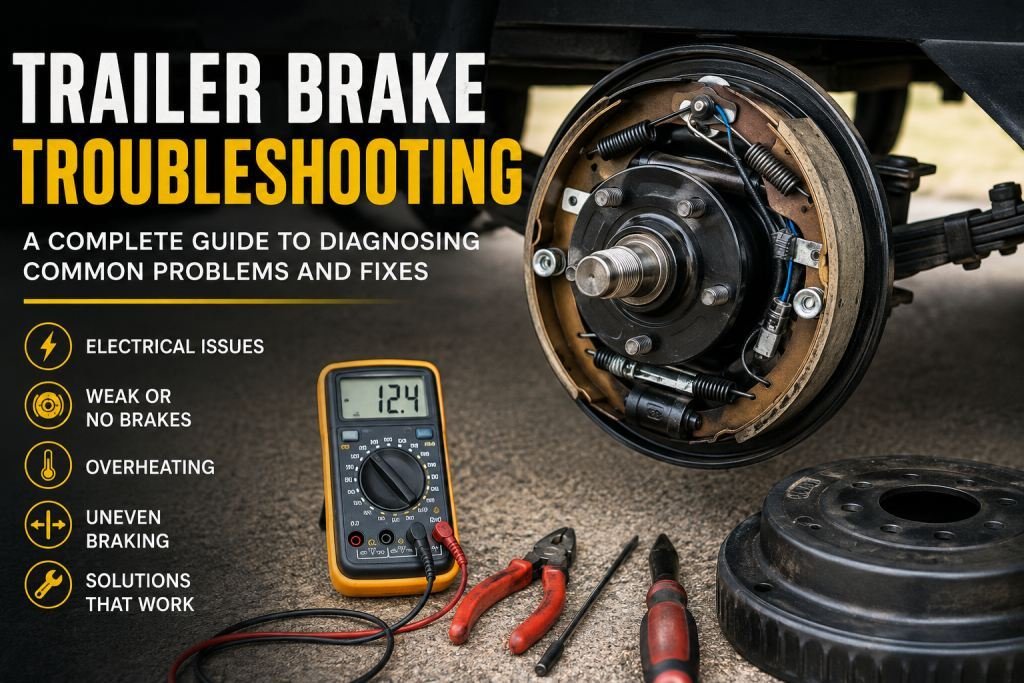
Many trailers use electric drum brakes. When the tow vehicle’s brakes are applied, a brake controller sends electrical current through the trailer wiring to electromagnets inside the brake assemblies.
The magnets are attracted to the rotating drum surface. Their movement activates the brake shoes, pressing them against the inside of the drum and creating friction that slows the wheel.
The amount of braking force depends on several factors, including:
- Brake controller output
- Electrical voltage reaching the brakes
- Wiring and connector condition
- Ground connections
- Brake magnet condition
- Brake shoe condition
- Drum condition
- Brake adjustment
A problem anywhere in this chain can affect braking performance.
Hydraulic surge brakes work differently and require a different diagnostic process, so this guide focuses primarily on common electric trailer brake systems.
Common Signs of Trailer Brake Problems
Trailer brake problems do not always result in complete brake failure. In many cases, performance deteriorates gradually.
Pay attention if you notice the trailer pushing the tow vehicle forward during stops, requiring unusually long stopping distances, or behaving differently from one trip to another.
Other warning signs include brakes that grab suddenly, wheels that lock too easily, uneven braking, excessive heat around one wheel, unusual noises, or a brake controller displaying an error.
Intermittent problems are especially important to investigate. If the brakes work over smooth roads but fail after hitting bumps, for example, a loose connection or damaged wire may be responsible.
The symptom provides the starting point for an effective diagnosis.
Trailer Brakes Not Working at All
If none of the trailer brakes are operating, begin with components shared by the entire system rather than immediately removing individual wheels.
Check the trailer connector first. Make sure the plug is fully seated and inspect the pins for dirt, corrosion, moisture, bending, or physical damage.
Next, check the brake controller.
Verify that it is powered and configured correctly for the trailer. If your controller has a manual activation lever or button, use it according to the manufacturer’s instructions to determine whether it sends braking output to the trailer.
If there is still no braking response, inspect:
- Tow vehicle fuses and circuit protection
- Brake controller connections
- Trailer brake output circuit
- Trailer plug and socket
- Main trailer wiring
- Ground connections
A multimeter can be useful for checking whether voltage is present at appropriate points in the circuit. Testing should follow the wiring specifications for your particular tow vehicle, brake controller, and trailer.
If voltage leaves the brake controller but does not reach the trailer brakes, the fault is likely somewhere between those points.
Trailer Brakes Are Weak
Weak braking is one of the most common complaints among trailer owners.
You press the brake pedal, the controller appears to be working, and the trailer brakes respond—but they do not provide enough stopping force.
Start by checking the brake controller settings. Insufficient gain or output can make properly functioning brakes feel weak.
However, increasing controller gain should not be used to hide an underlying mechanical or electrical problem.
Weak trailer brakes may also result from:
- Poor electrical connections
- Excessive voltage drop
- Corroded connectors
- Undersized or damaged wiring
- Weak brake magnets
- Poor ground connections
- Worn brake shoes
- Contaminated friction surfaces
- Incorrect brake adjustment
Electric drum brakes often require proper adjustment to maintain effective braking. If the shoes sit too far from the drum surface, braking response can become delayed or weak.
Some brake assemblies are self-adjusting, while others require periodic manual adjustment. Always verify which type is installed before servicing them.
Trailer Brakes Lock Up
Brakes that lock too easily can be just as problematic as brakes that are too weak.
If multiple wheels lock during normal braking, check the brake controller output. The gain may be set too high for the trailer’s current weight and road conditions.
Controller settings may need adjustment when trailer load changes significantly. A setting that works well with a heavily loaded trailer could be too aggressive when the trailer is lightly loaded.
If only one wheel locks, the problem is more likely localized to that wheel.
Possible causes include:
- Incorrect brake adjustment
- Contaminated brake components
- Damaged brake hardware
- Magnet problems
- Drum irregularities
- Wiring faults
Do not assume every lockup problem is caused by the controller. The pattern of the problem—one wheel versus all wheels—is an important diagnostic clue.
Trailer Brakes Work Intermittently
Intermittent brake operation often points toward an electrical connection problem.
Start with the trailer plug and socket. Movement, vibration, moisture, and road debris can affect connections over time.
Inspect wiring along the trailer frame for areas where insulation may have rubbed against metal. Pay particular attention to locations where wires bend, pass through openings, enter junction boxes, or run near suspension components.
Ground connections also deserve careful inspection.
A connection can look acceptable from the outside while corrosion exists between the terminal and mounting surface. Clean electrical contact is essential for reliable brake operation.
Loose connections may become more noticeable while driving because vibration can repeatedly open and close the circuit.
One Trailer Brake Is Not Working
When most brakes work correctly but one wheel provides little or no braking, focus your diagnosis on that wheel and its branch of the circuit.
Inspect the wiring leading to the affected brake assembly. Check connectors, splices, and visible wire damage.
If the electrical supply appears correct, the wheel may need to be removed for further inspection.
Possible causes include a failed or worn magnet, damaged wiring inside the brake assembly, worn shoes, broken hardware, contamination, or incorrect adjustment.
Comparing the affected wheel with a properly functioning wheel on the same trailer can sometimes help identify obvious differences.
However, resistance and current specifications vary by brake size and manufacturer. Use the brake manufacturer’s specifications rather than relying on a universal resistance value.
Trailer Pulls to One Side During Braking
A trailer that pulls or feels unstable while braking may have uneven brake force between the wheels.
One brake may be working more aggressively than another, or one side may not be contributing enough braking force.
Potential causes include uneven adjustment, wiring resistance, worn components, contaminated brake shoes, magnet problems, or mechanical damage.
Tire condition and inflation should also be checked because handling problems are not always caused exclusively by the brakes.
If the pulling begins specifically when braking is applied, however, brake imbalance should be investigated.
Trailer Brakes Overheating
A warm brake assembly after use is not automatically a sign of failure. Braking naturally produces heat.
A wheel that becomes dramatically hotter than the others, however, deserves immediate attention.
Excessive heat may indicate:
- Brake adjusted too tightly
- Brake components dragging
- Mechanical hardware not releasing properly
- Bearing problems
- Electrical brake activation when it should not occur
Comparing wheel temperatures can help identify an abnormal condition, but avoid touching potentially hot hubs or drums directly.
Persistent overheating should be corrected before continued towing because excessive heat can damage braking components and may indicate a serious mechanical problem.
Brake Controller Says “No Trailer” or Shows an Error
Modern brake controllers may detect connection problems and display a warning or error message.
If the controller suddenly stops recognizing the trailer, inspect the connector before assuming the controller itself has failed.
Disconnect the trailer safely and inspect both sides of the connection for corrosion, contamination, bent terminals, or loose contacts.
Next, examine the trailer’s ground circuit and brake wiring.
If the error occurs only while driving, vibration-related wiring faults should be considered. A wire may have damaged insulation or a connector may be loose enough to lose contact temporarily.
Controller-specific error codes should always be checked against the manufacturer’s documentation.
A Practical Trailer Brake Troubleshooting Process
Randomly replacing components can become expensive without solving the actual problem. A systematic process is more effective.
Step 1: Identify the symptom. Determine whether the brakes are completely inoperative, weak, overly aggressive, intermittent, uneven, or overheating.
Step 2: Determine the scope. Is the problem affecting every brake or only one wheel? A system-wide failure suggests a shared electrical or controller issue, while a single-wheel problem usually points toward a localized fault.
Step 3: Check the brake controller. Confirm that the controller is powered, configured correctly, and responding as expected.
Step 4: Inspect the trailer connector. Look for corrosion, dirt, moisture, damaged pins, and loose connections.
Step 5: Check wiring and grounds. Inspect accessible wiring from the connector toward the brake assemblies.
Step 6: Test the electrical circuit. When appropriate, use a multimeter or other suitable test equipment to verify voltage and circuit continuity according to manufacturer specifications.
Step 7: Inspect mechanical components. If the electrical system is functioning correctly, inspect magnets, shoes, drums, adjusters, and associated brake hardware.
Step 8: Test carefully. After repairs or adjustments, test braking performance in a safe, controlled environment before returning to normal road use.
This approach helps isolate the source of the problem instead of relying on guesswork.
Electrical vs. Mechanical Trailer Brake Problems
One of the most useful troubleshooting skills is determining whether a fault is electrical or mechanical.
| Symptom | Possible Electrical Cause | Possible Mechanical Cause |
|---|---|---|
| No brakes | No controller output, broken wire, bad ground | Major brake assembly failure |
| Weak brakes | Voltage drop, poor connection | Worn shoes, poor adjustment |
| One brake not working | Broken branch wire, magnet fault | Damaged hardware |
| Brakes lock | Excessive controller output | Over-adjusted brake |
| Intermittent braking | Loose plug, damaged wiring | Less commonly mechanical |
| One wheel overheats | Unwanted electrical activation | Dragging brake or bearing issue |
The table provides a starting point, not a final diagnosis. Several problems can produce similar symptoms, so proper inspection and testing are still necessary.
Don’t Overlook the Ground Connection
Ground faults deserve special attention during electric trailer brake troubleshooting.
The braking circuit depends on a reliable electrical path. Corrosion, loose hardware, damaged wiring, or poor contact at grounding points can increase resistance and reduce brake performance.
When inspecting a ground connection, check more than whether the bolt is physically present.
Look for corrosion between contact surfaces, loose terminals, damaged wire strands, and questionable splices. If a connection is exposed to road spray and weather, inspect it periodically.
Reliable wiring is especially important on trailers because vibration, moisture, salt, dirt, and repeated connection cycles create a demanding environment for electrical components.
When Should Trailer Brakes Be Inspected?
There is no single maintenance interval that fits every trailer.
Inspection frequency depends on the trailer manufacturer’s recommendations, brake manufacturer’s requirements, mileage, towing frequency, operating conditions, trailer weight, and brake design.
A trailer used occasionally on paved roads may have different maintenance needs from a commercial equipment trailer operating frequently under heavy loads.
As a practical habit, include brake operation in your pre-trip checks. Periodically perform a more detailed inspection of wiring, connectors, adjustment, drums, shoes, magnets, and wheel-end components according to the applicable service schedule.
If braking behavior changes unexpectedly, inspect the system rather than waiting for the next scheduled service.
When to Call a Professional
Some basic trailer brake troubleshooting can be performed by owners who have the proper tools and mechanical knowledge.
Professional diagnosis is the better choice when the cause cannot be identified confidently, electrical testing produces inconsistent results, brake components show significant damage, wiring requires extensive repair, or the trailer continues to brake unevenly after adjustment.
You should also seek qualified service if you are uncertain whether a repair has restored safe operation.
Brakes are a safety-critical system. Replacing parts through trial and error is not a substitute for accurate diagnosis.
Frequently Asked Questions About Trailer Brake Troubleshooting
Why are my trailer brakes suddenly not working?
Possible causes include a disconnected or damaged trailer plug, blown circuit protection, brake controller problems, broken wiring, poor grounding, or faults within the brake assemblies. If every brake stops working simultaneously, begin by checking components shared by the entire system.
Why do my trailer brakes work manually but not with the brake pedal?
This can indicate a problem involving the brake controller’s activation signal, configuration, installation, or related tow-vehicle circuitry. Because controller designs differ, consult the specific manufacturer’s troubleshooting procedure.
Why are my electric trailer brakes weak?
Common causes include low controller output, poor brake adjustment, worn components, weak magnets, voltage drop, damaged wiring, and corroded electrical connections.
Why does only one trailer wheel lock when braking?
A single-wheel lockup is more likely to involve a localized issue such as adjustment, contamination, brake hardware, drum condition, magnet behavior, or wiring at that wheel.
Can a bad ground cause trailer brake problems?
Yes. Poor ground connections can contribute to weak, inconsistent, or intermittent electric brake operation. Grounds should be included in any thorough electrical inspection.
Should I adjust the brake controller to compensate for weak brakes?
Controller gain should be set correctly for the trailer and load, but increasing output should not be used to compensate for worn, damaged, contaminated, or incorrectly adjusted brakes. Diagnose the underlying problem first.
Final Thoughts
Successful trailer brake troubleshooting is about following the braking system logically—from the brake controller and electrical connector to the wiring, grounds, magnets, and mechanical brake components.
Start with the symptoms. Determine whether the problem affects the entire trailer or an individual wheel, inspect the simplest potential causes first, and use proper testing rather than replacing parts at random.
Most importantly, treat any significant change in braking performance as a reason for inspection. Reliable trailer brakes contribute to shorter, more controlled stops and reduce unnecessary braking demands on the tow vehicle.
For trailer owners and towing enthusiasts, preventive inspection is often easier and less expensive than dealing with a brake failure on the road. A well-maintained braking system, combined with correct loading, appropriate towing equipment, and responsible driving, provides a stronger foundation for safer towing.